Visual Studio Code is a lightweight integrated development environment. It can be used to develop in C/C++ (among other programming languages) on Windows, Linux and macOS.
In this document, we describe how Visual Studio Code can be installed and which plugins should be used to work with the SUMO code base.
Installation#
Download#
The proprietary binaries for Visual Studio Code can be downloaded from here. There are also open source binaries which can be downloaded from here (MIT license).
Plugins#
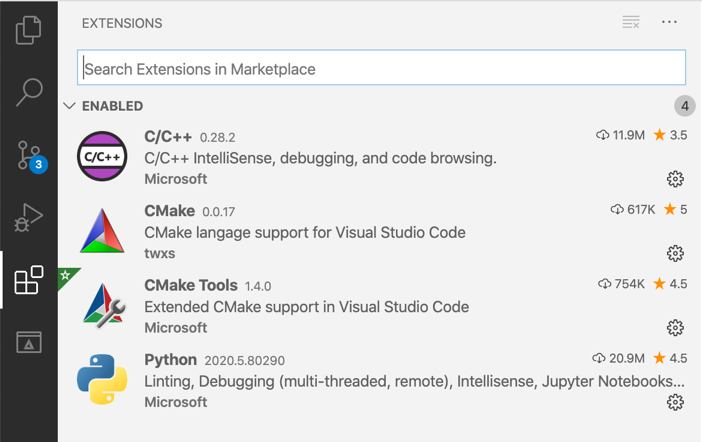
The standard installation of Visual Studio Code does provide only basic support for source code editing in C/C++ and Python. For this purpose, Visual Studio Code can be extended with plugins to provide additional functionality. We recommend (at least) the following plugins:
- C/C++ from Microsoft to simplify code browsing, enable code completion and debugging
- CMake Tools from Microsoft to benefit from CMake build support
- Python by Microsoft to benefit from code browsing, code completion and debugging in Python
- CMake by twxs to have support for the CMake specification language when editing
CMakeLists.txtfiles
You do not need to select them manually. Usually it is also fine if you open some .cpp and some .py file and just install the plugins Visual Studio Code recommends.
After you successfully installed these plugins, you will probably have to restart Visual Studio Code before they can be used.
Configuration#
Before opening the SUMO code base in Visual Studio Code, you should make sure, that the CMake Tools Plugin is properly configured. A click on the cogwheel of the plugin allows you to open the extension settings window.
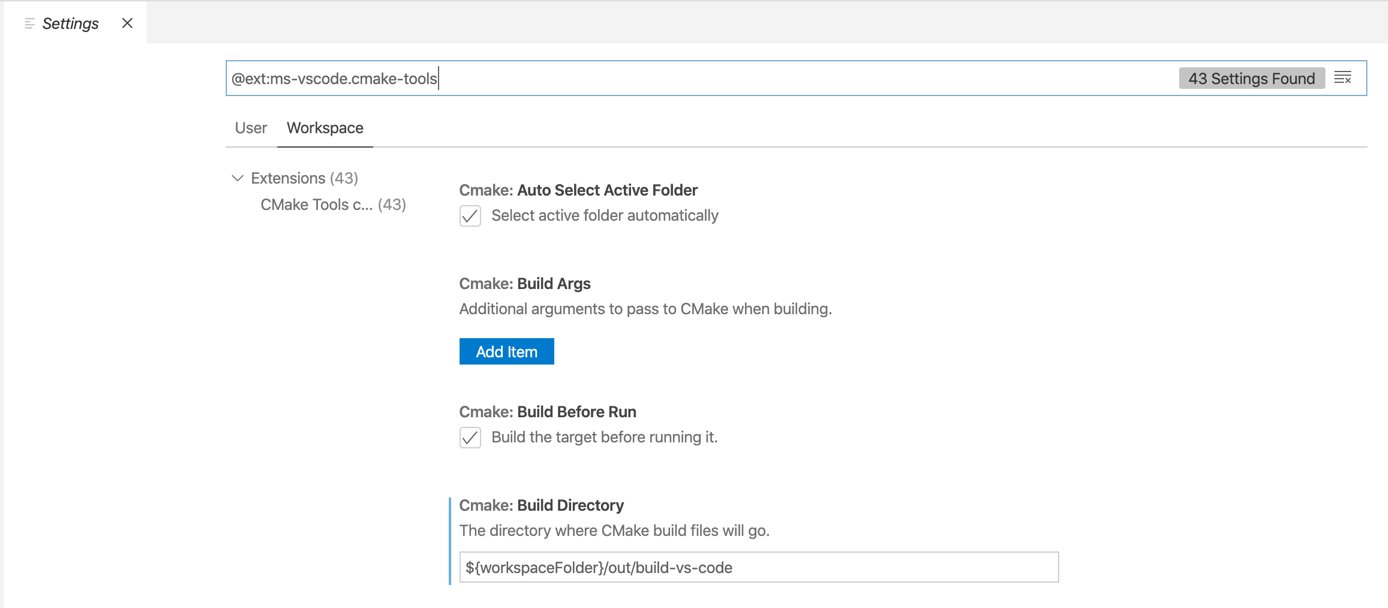
Please note, that you can set these settings either for the user or for the current workspace, thus affecting all CMake projects in your workspace.
We would recommend to modify the following settings:
- Cmake: Build Directory: set to your out of source build directory, e.g.
${workspaceFolder}/build/vscode/${buildType} - Cmake: Parallel Jobs: if you have multiple CPUs or multiple CPU cores, set to a value of
2 * N, whereasNdenotes the number of cores on your machine, e.g.2
Working with the SUMO Repository#
You can now open the local SUMO git repository in Visual Studio Code with File -> Open ... and point it to the directory of the repository.
CMake Configuration#
The CMake Tools plugin should automatically recognize the CMakeLists.txt file in the top-level SUMO directory and trigger a CMake configuration to find the compilers and available libraries. You can see the results of that process in the output window on the bottom.
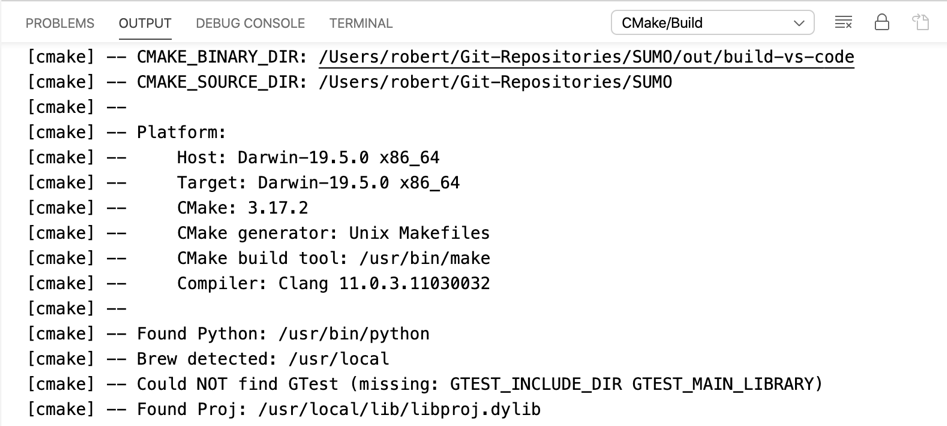
You may have different C/C++ compilers installed on your machine. In CMake, these different compiler installations are referred to as compiler kits. The CMake Tools plugin allows you to switch between different compiler kits by opening the command palette (Command + Shift + P on macOS) and enter CMake: Select a kit.
SUMO provides certain features that may be enabled or disabled during compilation. CMake refers to these features as variants. These variants are defined in the cmake-variants.yaml file in the top-level directory of your SUMO repository. This file describes certain features or properties for the CMake configuration process. In Visual Studio Code, you can easily switch between different predefined variants by using the command palette and entering CMake: Select Variant. You should use this feature to quickly switch between a release and a debug build of SUMO.
CMake Build#
A build can be triggered either by using the command palette (CMake: Build) or by pressing F7. The build process for a specific target can be triggered with the command palette (CMake: Build Target) or by pressing Shift + F7. You can follow the build results in the output window in the lower half.
Running and Debugging#
One of the generated binaries either with or without a debugger can be started in the Run menu or by pressing F5 or Ctrl + F5. In the next step, you will quickly notice, that Visual Studio Code requires the definition of run configurations. These are defined in the .vscode/launch.json configuration file. To generate a good launch.json for sumo, you can run the script tools/devel/generate_vscode_tasks.py (be aware that it overwrites any existing launch.json). You can also click on the Add Configuration... button on the bottom to add a new configuration for SUMO.
A simple configuration to launch sumo on macOS can be seen here:
{
    // Use IntelliSense to learn about possible attributes.
    // Hover to view descriptions of existing attributes.
    // For more information, visit: https://go.microsoft.com/fwlink/?linkid=830387
    "version": "0.2.0",
    "configurations": [
        {
            "name": "Start SUMO ",
            "type": "cppdbg",
            "request": "launch",
            "program": "${workspaceFolder}/bin/sumo",
            "args": [],
            "stopAtEntry": false,
            "cwd": "${workspaceFolder}",
            "environment": [],
            "externalConsole": false,
            "MIMode": "lldb"
        }
    ]
}
Note
If you try to launch sumo-gui with a run configuration on macOS, the launch will fail because it cannot find the proper DISPLAY variable of the XQuartz server instance. A workaround seems to be to define a preLaunchTask in the configuration above which exports the DISPLAY variable for the debugging session. However, this needs more testing.
General Remarks#
Keyboard Shortcuts#
Visual Studio Code is designed to be primarily used with a keyboard, therefore it is a very good idea to start memorizing some of the most important shortcuts:
- Show all commands in the command palette: Shift + Command + P
- Go to file: Command + P
- Start Build: F7
- Start Debugging: F5
General Documentation#
General documentation to the usage of Visual Studio Code can be found on various places on the internet, e.g. Visual Studio Code Tutorial for Beginners - Introduction or Visual Studio Code Intro & Setup.