Windows Build
This document describes how to build SUMO under Windows using only freely available (this does not mean "open source") tools. Instructions on how to build SUMO on Windows using an Open Source toolchain are included in our building on Linux page. Please note that you may also download pre-built Windows binaries.
Prerequisites#
- A Visual Studio Community, Professional or Enterprise 2017 or later installation
- CMake for Windows
- Python 3.X
- SUMO sources (either an unpacked src zip or a git clone, see Getting the source code)
- Installed Libraries (Xerces-C, Proj, Fox) preferably by cloning https://github.com/DLR-TS/SUMOLibraries/
- Make sure that the
SUMO_LIBRARIESenvironment variable points to your cloned directory in case you didn't put the libraries in the same directory as the SUMO repository - Note that in case you don't have admin rights, you can still configure environment variables for you only
- Make sure that the
Recommended Windows setup#
- Download Visual Studio Community Edition
- Start the installer and select:
- Python development (including native tools)
- Desktop development with C++
- Start the installer and select:

- Clone https://github.com/eclipse-sumo/sumo or open your existing local SUMO folder
- Go to team explorer
- Choose Manage Connections, then "Local Git"->Clone https://github.com/DLR-TS/SUMOLibraries
- Now be patient until CMake starts configuring
- If it does not or you want to reconfigure choose Project->Generate Cache (if this option is not there you may need to wait a little longer until Visual Studio has picked up everything)
- Select Build->Build All (CMake->Build All in earlier versions)
- Set the SUMO_HOME environment variable
- Install Texttest https://sourceforge.net/projects/texttest/files/latest/download
CMake settings can easily be modified, loaded and saved using Project -> CMake Settings in Visual Studio.
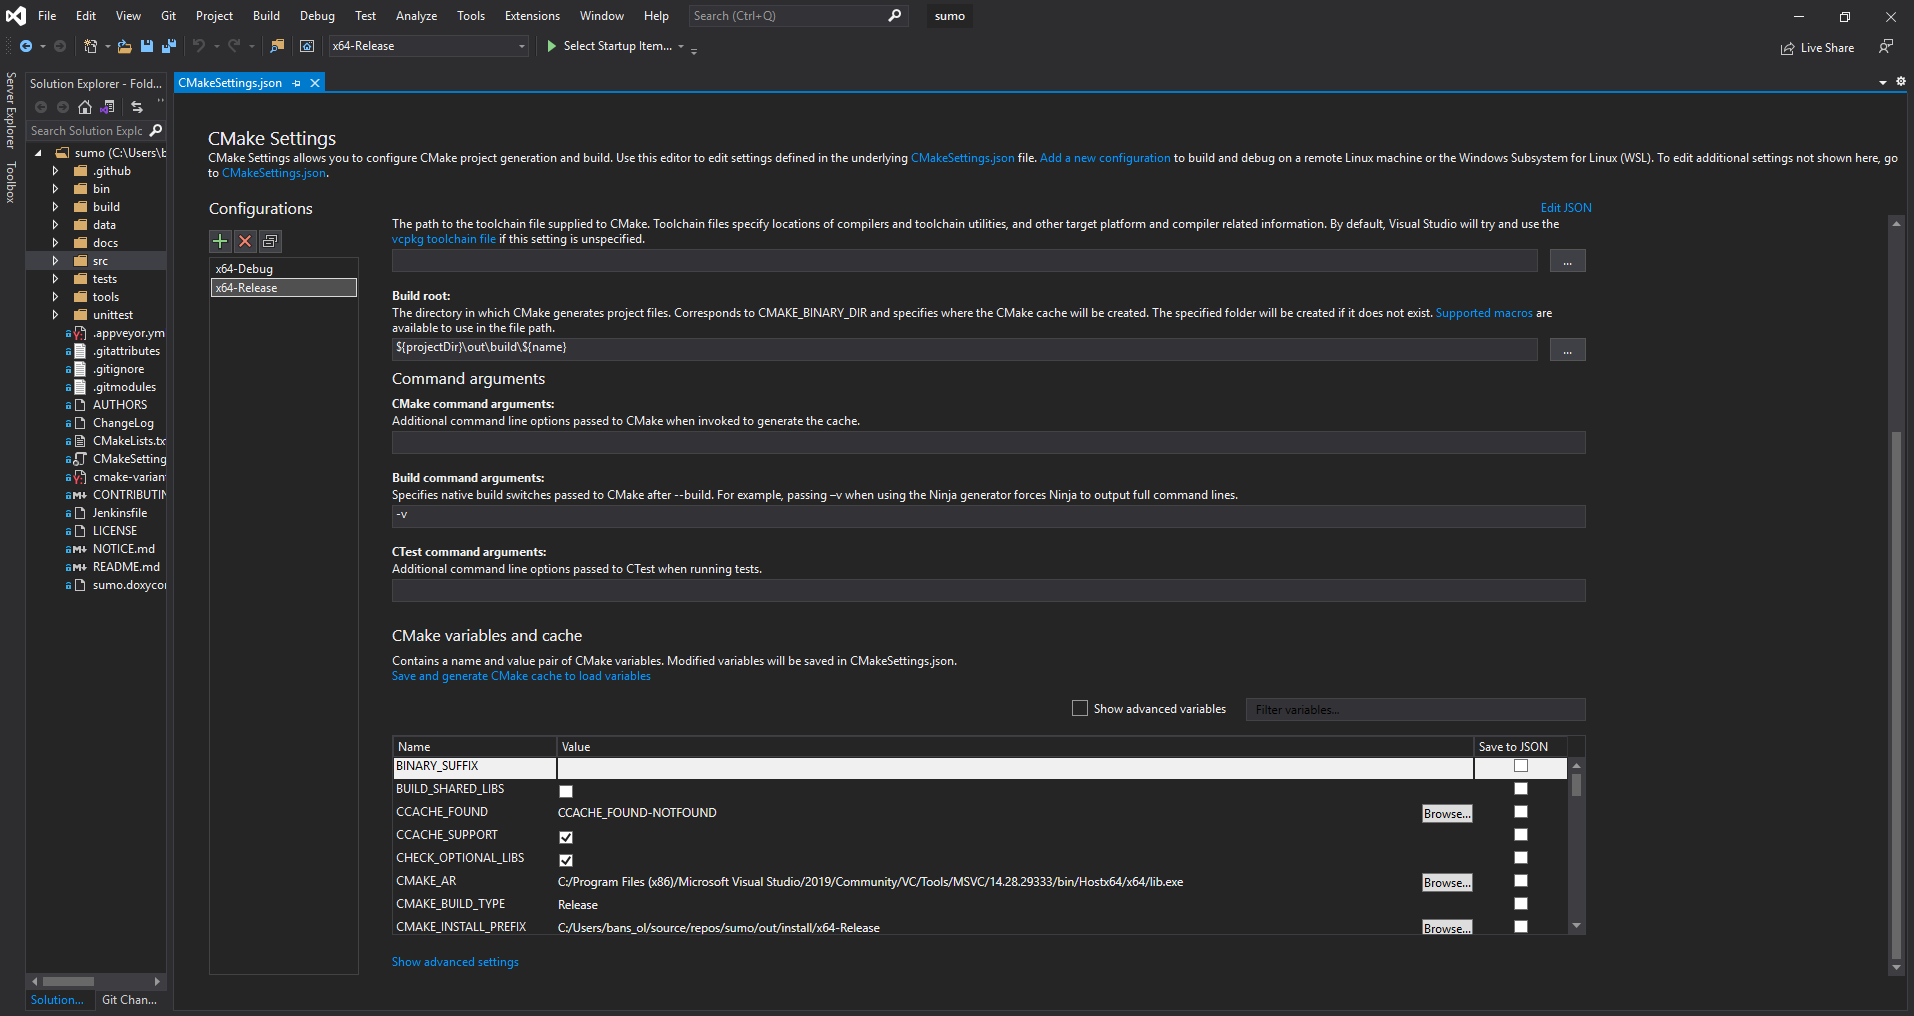
Editing the CMake settings using Visual Studio
Optional but still recommended steps#
- Install Notepad++
- Install TortoiseGit
- Install Git command line tools (this is mandatory if you install TortoiseGit)
- If you decide to use the Python which comes with Visual Studio
- Test start a python script and add association
- Add Python to the path (also the Scripts dir), find it at
C:\Program Files (x86)\Microsoft Visual Studio\Shared\Python37_64 - Install pyautogui, scipy, rtree, pyproj, lxml following the instructions https://docs.microsoft.com/en-us/visualstudio/python/tutorial-working-with-python-in-visual-studio-step-05-installing-packages?view=vs-2019
- If not, use
pip install -r tools\requirements.txt -r tools\req_dev.txt, possibly with the--useroption if you don't have admin rights
- (after 30 days) Setup a Microsoft account (if you do not already have one) and register your Visual Studio
Further notes#
If you need a different python version or want to test with multiple Pythons you can either install them directly from Visual Studio or Download Python for Windows and install it. Most SUMO tools should work with Python 2 and 3. Please make sure that you install the recommended python modules as explained above and that the PATH environment variable contains the directory where the desired Python interpreter is.
If you want to build SUMO in Debug mode, then you will need the Python Debug binaries. The Python interpreter that comes with Visual Studio doesn't install these libraries by default (at least in the case of Visual Studio Community 2022); you need to install the Data Science stack in addition to the Python and C++ development stacks mentioned above. More precisely, the component you need is called Python native development tools, make sure you check the correct box.
If you want to clone / checkout a special SUMO version, you can of course do it from the command line (if you have installed the command line tools)
using git clone --recursive https://github.com/eclipse-sumo/sumo or download and extract a source package, see Downloads.
The command for the Libraries is: git clone --recursive https://github.com/DLR-TS/SUMOLibraries. If you do not place the libraries in the same folder as SUMO, you will need to set the SUMO_LIBRARIES environment variable to the directory.
If Visual Studio fails at first try, it is probably because the SUMOLibraries are not cloned yet or are in an unusual location. The errors are due to Xerces not being found. Try:
- Select Project->"Generate Cache" to try again (it is CMake->Generate in earlier Visual Studio versions) or see below.
Adapting settings#
If you need to modify settings, you can edit the CMakeCache.txt by opening it in your favorite text editor or via the Project->CMake-Cache menu. The following things might be useful:
- If the libraries are not found, set
SUMO_LIBRARIES:PATHto something likeC:/Users/tests/source/repos/SUMOLibrariesand retry - If a wrong Python interpreter or library is found, edit the PYTHON_* variables
- If you want to disable building the GUI (Fox) or usage of Proj, set the according library entries to an empty string
- To enable console output for the Release build of graphical applications sumo-gui and netedit, set CONSOLE_RELEASE=1
To make a debug build, you should not change CMAKE_BUILD_TYPE in the cache file. You should choose a different configuration in the GUI instead.
Libraries#
We provide a central location for getting all dependent libraries at
https://github.com/DLR-TS/SUMOLibraries. The easiest way is to clone
this repository and define an environment variable SUMO_LIBRARIES
pointing to the resulting directory. They are build using Visual Studio
2019, but may be used with earlier and later versions as well. You may
need to install the Visual C++ 2019 Runtime Distributable for running
SUMO (tested with Visual Studio 2019).
For details on building your
own and also on how to use different versions and additional libraries
see Installing/Windows_Libraries.
You might not to edit your CMakeCache.txt to use the selfmade libraries.
vcpkg support#
If you cannot use SUMOLibraries or want to build from source (maybe for different platforms or because you want to anble or disable certain features in the libraries), you can also try to build against vcpkg. The setup follows those basic steps.
git clone https://github.com/Microsoft/vcpkg.git
cd vcpkg
./bootstrap-vcpkg.sh
./vcpkg install arrow gdal xerces-c gettext fmt eigen3
Unless you are determined that all your builds will use vcpkg libraries,
you should not call ./vcpkg integrate install because it might mess up
your environment if you decide to build against SUMOLibraries at a later point.
Instead you should add
-DCMAKE_TOOLCHAIN_FILE=<vcpkg-root>/scripts/buildsystems/vcpkg.cmake to your cmake options.
Unfortunately the FOX toolkit is still missing from vcpkg so you cannot build any GUI applications by using only vcpkg.
Install python packages#
For using the SUMO Python tools from the command line or in netedit it is recommended to install a list of python packages. From your SUMO directory you can install them using pip:
pip install -r tools\requirements.txt
Manual CMake configuration#
Method 1: Via CMake GUI#
- Start the CMake gui
- Select the source path (e.g. D:\projects\sumo)
- Select the build path (e.g. D:\projects\sumo\cmake-build)
- It can be identical to the source path, but we recommend to separate them
- Build directory will be created if necessary
- Start configuration by pressing the "Configure" button
- Select the compiler (the default should do)
- Select the platform
x64
- Create the Visual Studio solution by clicking on "Generate"
- Open the generated solution (.sln file) (e.g. D:\projects\sumo\cmake-build\SUMO.sln) using the File Explorer or by clicking on "Open Project"
- Build the configurations you want
- Binaries will appear in D:\projects\sumo\bin
Visual guide:
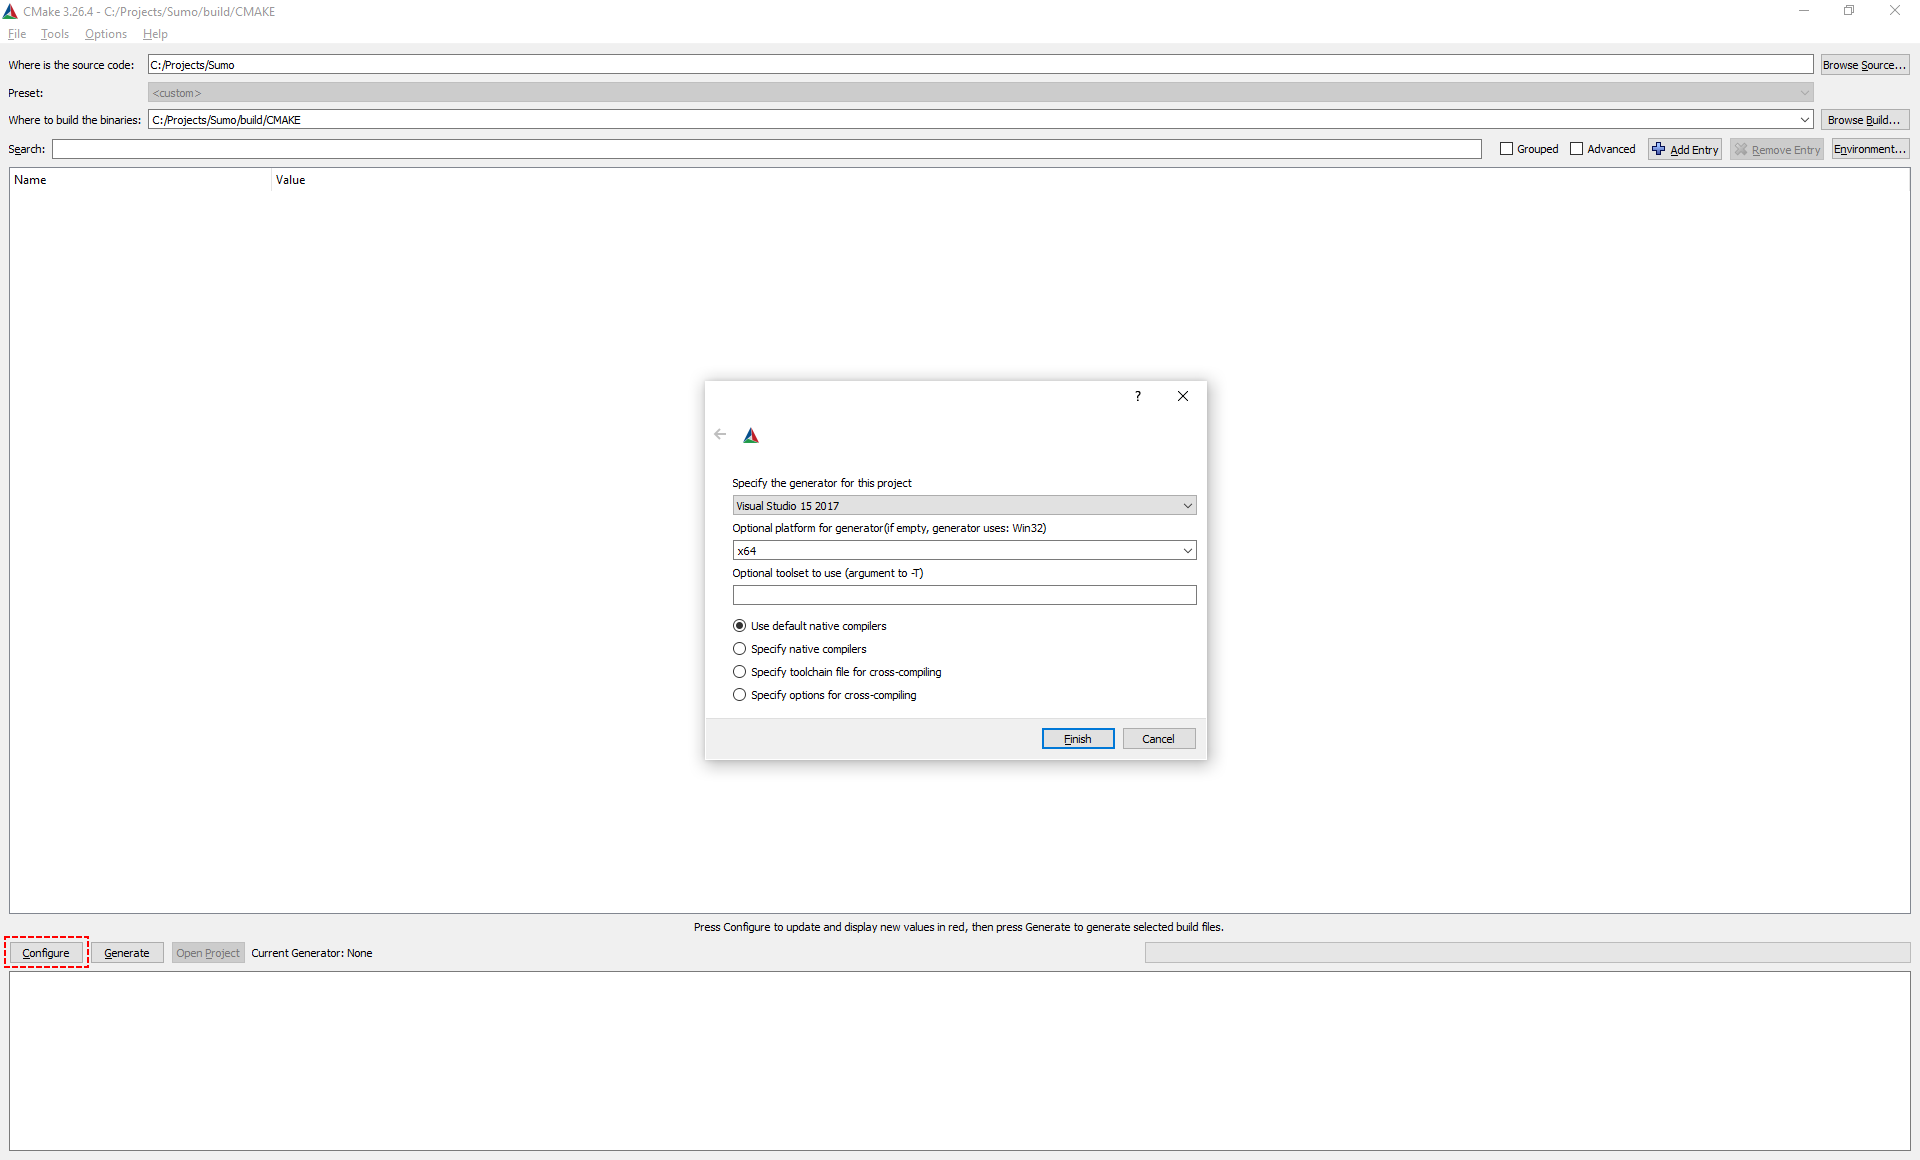 Selecting Solution (Visual Studio, Eclipse, etc.) in the CMake gui
 Libraries successfully configured
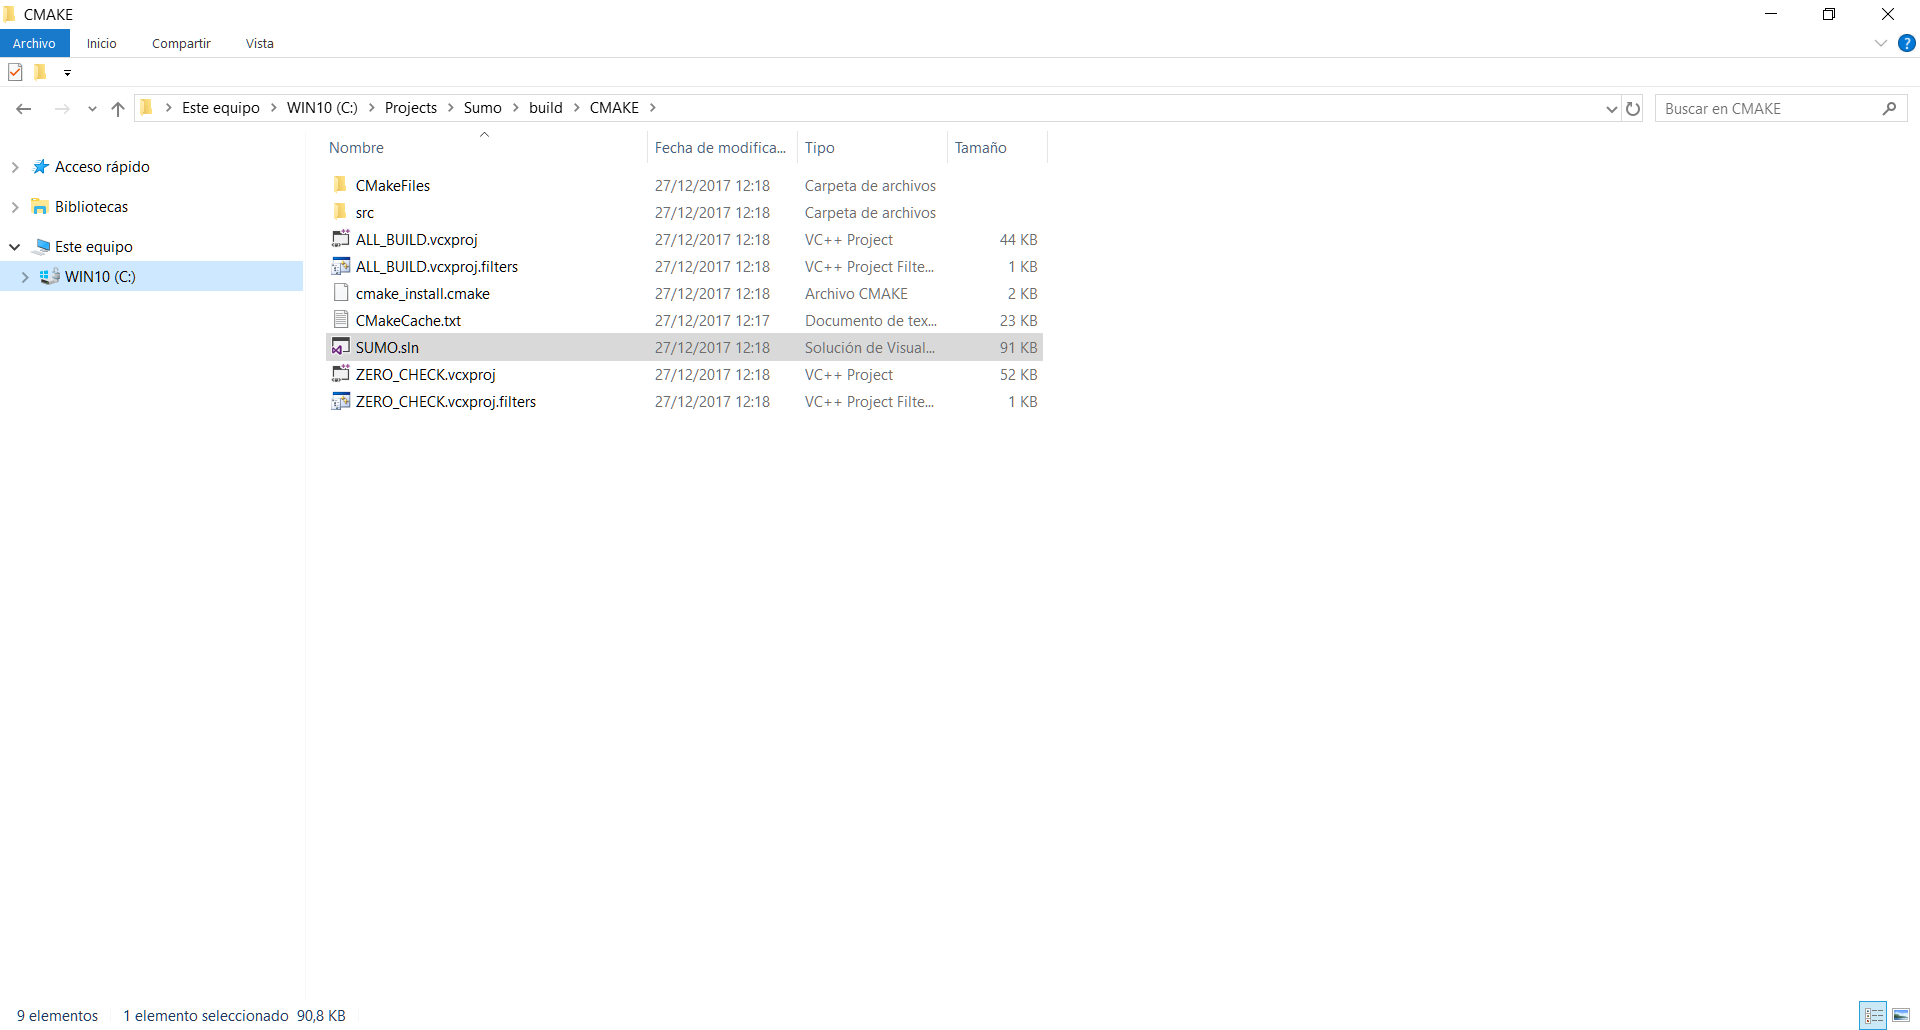 Generated solution
Method 2: Via CMake command line#
- Go to the source path (e.g.
cd D:\projects\sumo) - Create a build directory (e.g.
mkdir cmake-build && cd cmake-build) - Run CMake with the correct Visual Studio version (e.g.
cmake .. -G "Visual Studio 16 2019 Win64")- For a list of all possible generators run
cmake --help
- For a list of all possible generators run
- Open the solution D:\projects\sumo\cmake-build\SUMO.sln
- Or build from the command line using
cmake --build . --config Release
- Or build from the command line using
Tests#
If you plan to extend SUMO yourself, or just want to know whether everything compiled OK, it is strongly recommended to have a look at Developer/Tests. This tool makes it easier to check whether some existing functionality was broken by the extensions.
CLang#
If you want to compile using CLang in Windows, just add "ClangCL" in CMake's "Optional Toolset" (-T).
Troubleshooting#
- Note on installation paths: MSVC seems to have difficulties with
include and library paths containing spaces (for instance
C:\Program Files). Thus try to avoid installing SUMO or any of the libraries in such paths. - Python cannot be found
- Make sure that there are not two different Python versions installed
- Python libraries can be specified manually (e.g. <PythonFolder>\libs\python<version>.lib)
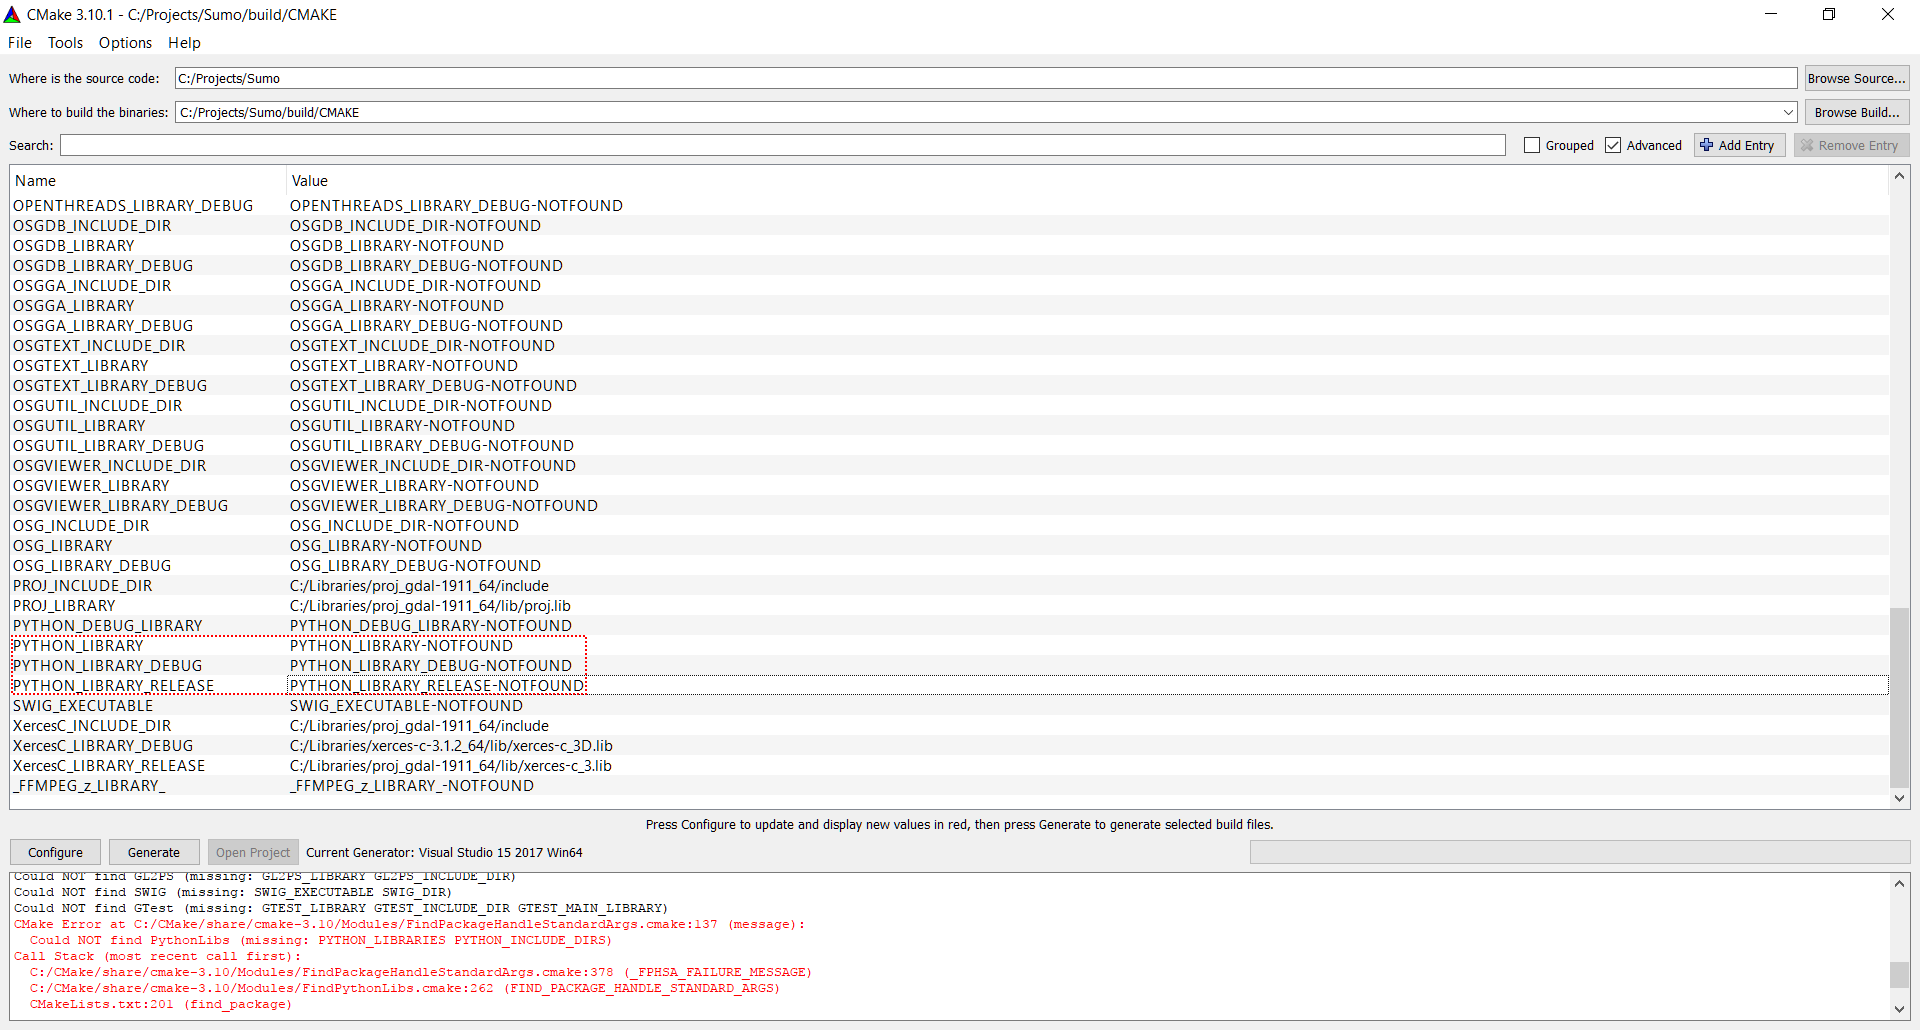 Python library fields in the CMake Cache
 Two different Python versions at the same time
Linker reports something similar to "LINK : fatal error LNK1104: cannot open file 'C:\Program.obj'"#
You probably have installed a library to a path containing white spaces in its name. In such a case, the according environment variable should be embedded in quotes (").
Example: set FOX="D:\my libs\fox-1.6.36"
Failure on pre-build event (missing version.h or *typemap.h)#
If Visual Studio reports a failed pre-build event you can safely ignore
this, unless you are building from the source code
repository. In
this case you should probably install Python. Even if Python is
installed the file associations may be broken which causes the
generation of src/version.h via the tools/build_config/version.py script to fail. Either
repair your file associations or undefine HAVE_VERSION_H in
src/config.h.cmake.
If you did install Python correctly, double check that it passes command line arguments. For a quick fix, you can also execute the following commands manually:
tools\build\version.py
tools\build\typemap.py
Execution cannot proceed because MSVCR120.dll/MSVCR140.dll was not found#
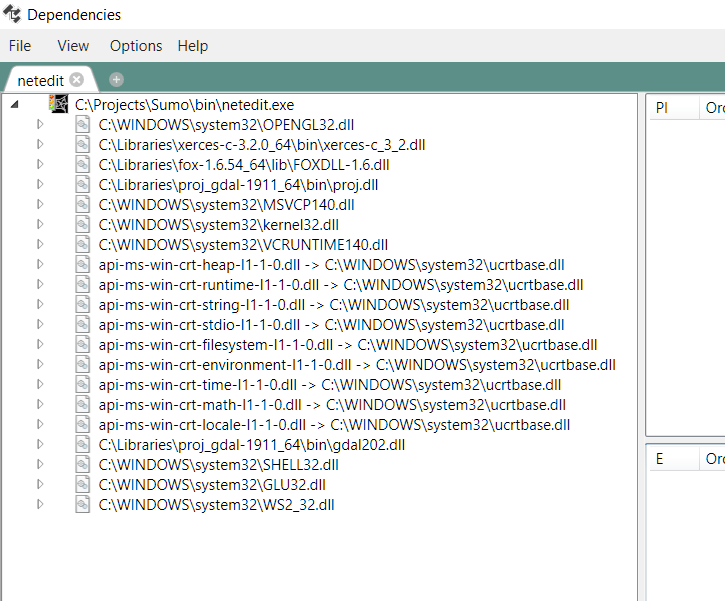
Install Microsoft Visual C++ Redistributable Packages for Visual Studio (use Visual Studio 2013 version for MSVCR120.dll). You can check if all dependencies are correct using Dependencies.
In debug mode, execution cannot proceed because MSVCR120D.dll/MSVCR140D.dll was not found#
Your version of Visual Studio doesn't support Debugging, you can only compile in release mode.
How to build JuPedSim and then build SUMO with JuPedSim#
In this section, you will learn how to build the latest version of the pedestrian simulator JuPedSim and how to compile SUMO with this latest version of JuPedSim, in case the release version of JuPedSim that comes with SUMO isn't sufficient for your needs. You can consult the JuPedSim build procedure here; hereafter proposes a similar procedure. First of all, clone the JuPedSim repository:
git clone https://github.com/PedestrianDynamics/jupedsim.git
Outside the repository directory, but at the same level, create two directories jupedsim-build and jupedsim-install (for instance), then type:
cd jupedsim-build
cmake -DCMAKE_INSTALL_PREFIX=../jupedsim-install ..
cmake --build . --config Release
cmake --install . --config Release
You can also change the configuration to Debug and also enable multithreading as usual which CMake. Now to integrate the latest version of JuPedSim into SUMO, please follow the standard build procedure for Windows: since the JuPedSim install folder is at the same level of SUMO, it will be found automatically. Alternatively, you can notify CMake where is JuPedSim installed by setting JUPEDSIM_CUSTOMDIR when calling CMake.
For further remarks on the use of JuPedSim inside SUMO, please consult this page.